Best Chewy Chocolate Chip Cookies: Brown Butter Recipe
- Time: Active 10 minutes, Passive 10 minutes, Total 20 minutes
- Flavor/Texture Hook: Toasted, nutty, and velvety centers
- Perfect for: Low cost luxury, weeknight treats, and bake sales
- Secret to the Best Chewy Chocolate Chip Cookies
- Techniques for a Perfect Bendy Center
- Official Baking Specs and Times
- Essential Ingredients for Better Cookies
- Equipment for Success
- The Step-by-Step Baking Method
- Fixing Common Baking Errors
- Flavor Variations and Smart Swaps
- Guide to Freezing and Storage
- Best Ways to Serve Cookies
- Cookie Myths Debunked
- Recipe FAQs
- 📝 Recipe Card
Secret to the Best Chewy Chocolate Chip Cookies
The first time the scent of browning butter hit my tiny kitchen, I knew my baking life had changed. It doesn't just smell like butter; it smells like toasted hazelnuts and caramel corn hitting a hot pan.
I remember standing over my stove, watching those little white specks at the bottom of the pan turn from gold to a deep, autumnal brown, feeling like I’d stumbled onto a massive secret.
This wasn't some fancy culinary school technique; it was just me, a saucepan, and the realization that five extra minutes on the heat could make a 50 cent stick of butter taste like a ten dollar artisanal block.
That’s the core of why these are the best chewy chocolate chip cookies you will ever pull out of an oven. We aren't relying on expensive, rare chocolates or imported flours. Instead, we’re using heat and smart ratios to squeeze every ounce of flavor out of the basics.
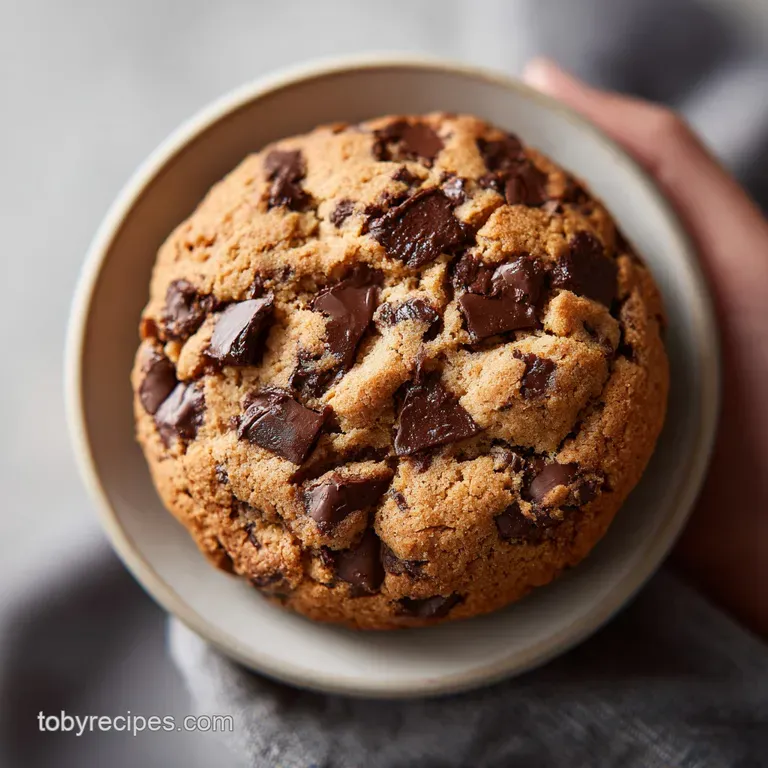
When you pull these out, the edges have a delicate shatter that gives way to a center so bendy and rich it almost feels like fudge. The aroma alone is enough to bring neighbors knocking, but it's the texture that keeps them coming back.
We've all been there expecting a soft cookie and getting a dry, crumbly disc that needs a gallon of milk just to be edible. I spent a long time thinking I was the problem, but it was really just the chemistry of the fats and sugars.
By switching to dark brown sugar and losing the electric mixer for a simple whisk, we create a dense, chewy structure that doesn't rely on air. It’s a heavy, satisfying cookie that feels expensive but costs pennies more than the stuff from a tube.
Trust me, once you go brown butter, there is absolutely no going back.
Techniques for a Perfect Bendy Center
Sugar Moisture Balance: Using mostly dark brown sugar provides molasses, which naturally draws in moisture from the air to keep things soft.
The Fat Transformation: Melting and browning the butter removes water content, which prevents the flour from developing too much tough gluten.
Yolk Enrichment: Adding a single extra egg yolk introduces more lecithin and fat, creating a velvety mouthfeel that whole eggs alone can't achieve.
Starch Suspension: A tiny bit of cornstarch acts like a sponge, holding onto moisture and preventing the cookies from becoming brittle as they cool.
| Premium Option | Budget Alternative | Flavor Impact | Savings |
|---|---|---|---|
| Chopped Valrhona Bar | 70% Dark Store Brand Chunks | Minimal; both provide rich pools of chocolate | Save $6.00 |
| Vanilla Bean Paste | Pure Vanilla Extract | Visible specks vs. pure classic flavor | Save $15.00 |
| European Cultured Butter | Standard Store Brand Butter | Culture adds tang, but browning levels the field | Save $4.00 |
There is a common misconception that you need the most expensive ingredients to get a "gourmet" result. In reality, the way you treat your ingredients matters more than the label on the package. Browning your budget butter creates a depth of flavor that even raw, expensive butter can't match.
This is the ultimate "chef's secret" for baking on a budget invest in the technique, not just the grocery bag.
The difference between a "good" cookie and a "legendary" one often comes down to how much water is in the dough. By browning the butter, we're actually cooking the water out. This means the sugars can dissolve more effectively into the fat, creating that shiny, crackly top we all love.
It’s a small step that pays off in a huge way.
Official Baking Specs and Times
| Ingredient | Science Role | Pro Secret |
|---|---|---|
| Dark Brown Sugar | Humectant & Flavor | Pack it tight to ensure the full 200g weight for maximum chew |
| Egg Yolk | Emulsifier | Use a cold yolk to help thicken the warm butter mixture faster |
| All Purpose Flour | Structural Base | Sifting is mandatory here to prevent dry pockets in the dense dough |
| Baking Soda | Leavening & Browning | It reacts with the acidic molasses in the sugar to create lift |
When you're looking at these specs, remember that baking is just delicious chemistry. The 350°F (175°C) temperature is the sweet spot where the edges can caramelize and set while the middle stays under baked enough to remain gooey.
If you go too low, the cookies spread into pancakes; too high, and they turn into crispy wafers before the center can even think about setting.
The weight of the ingredients is also vital. While I've provided cup measurements, if you have a scale, use the grams. A cup of flour can vary by 20% depending on how you scoop it, and in a recipe that relies on a specific ratio of fat to starch, that 20% is the difference between a soft cookie and a rock.
We want that velvety, melt in-your mouth experience, not a jaw workout.
Essential Ingredients for Better Cookies
To make these cookies, you’ll need a few basics that you likely already have in the pantry. The dark chocolate chunks are a personal favorite because they create larger "pools" of chocolate compared to standard chips, but use what fits your budget.
- 1 cup unsalted butter (225g): This is our flavor foundation. Browning it is non negotiable.
- 1 cup dark brown sugar, packed (200g): Why this? Provides the deep molasses flavor and moisture required for a chewy texture.
- 0.25 cup granulated cane sugar (50g): This helps the edges get that slight crispiness.
- 1 tablespoon pure vanilla extract (13g): Adds that nostalgic, floral aroma.
- 1 large egg (50g): Provides structure and binding.
- 1 large egg yolk (17g): Why this? The secret to the fudgy, velvety center without adding extra liquid.
- 2.25 cups all purpose flour (280g): Standard flour works perfectly here.
- 1 teaspoon cornstarch (3g): Keeps the crumb soft and prevents toughness.
- 1 teaspoon baking soda (6g): Our main lifting agent for a little puff.
- 0.75 teaspoon fine sea salt (4g): Why this? Balances the sugar and makes the chocolate flavors pop.
- 1.5 cups 70% dark chocolate chunks (250g): High cocoa content prevents the cookies from being cloyingly sweet.
Chef's Tip: If you only have light brown sugar, add a teaspoon of molasses to your sugar mix. It mimics the moisture and flavor of dark brown sugar perfectly without a trip to the store.
Equipment for Success
You don't need a fancy stand mixer for this. In fact, I prefer making these by hand. A large glass or ceramic bowl is best for mixing, and a light colored saucepan is essential for browning the butter so you can actually see the color change.
You will also need a whisk, a silicone spatula for folding, and a 3 tablespoon cookie scoop. The scoop isn't just for aesthetics; it ensures every cookie is the same size so they bake evenly. If you don't have one, a standard ice cream scoop or even a large spoon works just try to keep the portions consistent.
Finally, use heavy duty baking sheets and parchment paper to prevent the bottoms from scorching.
The step-by-step Baking Method

- Brown the butter. Melt 1 cup unsalted butter in a small saucepan over medium heat. Whisk constantly as it bubbles. Watch for the sizzle to die down and for brown bits to appear at the bottom. Once it smells like toasted nuts, pull it off the heat immediately. Note: It can go from perfect to burnt in ten seconds.
- Cool the butter. Let that liquid gold sit for exactly 5 minutes. We want it warm enough to dissolve sugar but not hot enough to scramble our eggs.
- Mix the sugars. In your large bowl, combine 1 cup dark brown sugar and 0.25 cup granulated sugar with the butter. Whisk until the lumps are gone and it looks like wet sand.
- Emulsify the liquids. Add the egg, egg yolk, and 1 tablespoon vanilla. Whisk vigorously for 1-2 minutes until the mixture becomes glossy and pales in color. This step is where the magic happens.
- Incorporate the dry. Sift in 2.25 cups flour, 1 teaspoon cornstarch, 1 teaspoon baking soda, and 0.75 teaspoon salt. Use a spatula to fold until you see no more white streaks.
- Add the chocolate. Fold in 1.5 cups dark chocolate chunks. The dough will be thick and heavy.
- Portion the dough. Use a 3 tablespoon scoop to drop dough onto your lined sheets. Give them space about 2 inches apart.
- Bake the cookies. Bake at 350°F (175°C) for 9-11 minutes. Pull them out when the edges are golden but the centers look slightly under baked. They will firm up as they cool on the pan.
Chef's Tip: Give the baking sheet a firm bang on the counter right after you take them out of the oven. This collapses any air pockets and creates those beautiful ripples on the surface.
Fixing Common Baking Errors
Fixing the Flat Cookie Spread
If your cookies turned into one giant sheet, your butter was likely too hot when you added the sugar, or your kitchen is very warm. The fat melted the sugar too quickly before the flour could provide structure.
To fix this, pop your dough balls in the fridge for 30 minutes before baking. Cold dough spreads slower, giving the flour time to set. Also, ensure you aren't placing dough onto a hot baking sheet from a previous batch always let the pans cool to room temperature first.
Fixing a Cakey Texture
A cakey cookie usually means too much air was whipped into the butter and eggs, or you used too much flour. Since we are whisking by hand, it's harder to over aerate, but it can happen if you get too aggressive with the whisk after the flour is added.
Always use a spatula once the flour hits the bowl. You want to fold, not beat. Also, make sure you aren't "packing" the flour into your measuring cups spoon it in and level it off with a knife to ensure you aren't accidentally adding an extra 1/4 cup of flour.
| Problem | Root Cause | Solution |
|---|---|---|
| Greasy Bottoms | Butter was too hot | Let browned butter cool for at least 5-10 minutes |
| Tough Cookies | Over mixing flour | Fold until just combined; stop as soon as streaks disappear |
| No Browning | Oven temp too low | Check oven with a thermometer; ensure it's at 350°F |
Common Mistakes Checklist:
- ✓ Never skip the 5 minute cooling period for the butter.
- ✓ Use large eggs, not medium or extra large, to keep the moisture ratio exact.
- ✓ Don't over bake! They should look a bit "raw" in the middle when you pull them out.
- ✓ Always use parchment paper or a silicone mat; greasing the pan directly causes too much spread.
- ✓ If the chocolate chunks are too big, chop them smaller so the dough can hold together.
Flavor Variations and Smart Swaps
| Original Ingredient | Substitute | Why It Works |
|---|---|---|
| Dark Chocolate Chunks | Semi Sweet Chips | Traditional flavor, though slightly sweeter. |
| All Purpose Flour | 1:1 gluten-free Blend | Rice based blends mimic the structure well. Note: May be slightly grittier. |
| Vanilla Extract | Dark Rum or Bourbon | Adds a smoky, complex depth that pairs with brown butter. |
If you want to try something different, add a half cup of toasted walnuts or pecans for a crunch that complements the nutty butter. You can also sprinkle a tiny pinch of flaky sea salt (like Maldon) on top immediately after baking.
It cuts through the richness of the 70% dark chocolate and makes the whole thing taste incredibly sophisticated.
Another favorite variation is the "espresso boost." Add one teaspoon of instant espresso powder to the dry ingredients. You won't taste coffee, but it will make the chocolate taste ten times more intense. It’s a cheap way to make basic chocolate taste like the expensive stuff.
Guide to Freezing and Storage
These cookies stay soft for up to 4 days if kept in an airtight container at room temperature. If you want to keep them longer, put a piece of plain white bread in the container with them. The cookies will actually pull the moisture out of the bread, staying velvety while the bread turns into a crouton.
It's an old school trick that works every single time.
For long term storage, freezing the dough is your best bet. Scoop the dough into balls and freeze them on a tray for an hour, then toss them into a freezer bag. You can bake them straight from frozen; just add 2 minutes to the baking time. They’ll keep for up to 3 months.
If you’ve already baked them, they freeze well for 2 months just thaw at room temperature for an hour before eating.
Don't let any "ugly" cookies go to waste. If you have broken bits or over baked ones, crush them up and use them as a topping for vanilla ice cream or fold them into a batch of brownies. You can even use the crumbs as a base for a cheesecake crust. There is no such thing as a wasted cookie in this kitchen!
Best Ways to Serve Cookies
There is nothing quite like a warm cookie about 10 minutes after it leaves the oven. This is when the chocolate is still liquid and the center is at its most tender. Serve them with a cold glass of milk the fattiness of the milk cleanses the palate after the rich, dark chocolate.
It’s a classic for a reason.
If you’re serving these for a party, try making "mini" versions by using a 1 tablespoon scoop and reducing the bake time to 7 minutes. They become perfect two bite treats. You can also use two cookies to make an epic ice cream sandwich.
Since these stay soft even when cold, they won't turn into bricks in the freezer, making them the ideal vessel for a big scoop of salted caramel ice cream.
- For a Movie Night: Serve with a side of salty popcorn to balance the sweet.
- For a Gift: Stack them in a glass jar with a ribbon; they're sturdy enough to travel.
- For a Cold Day: Dip them into a hot cup of black coffee or Earl Grey tea.
Cookie Myths Debunked
Many people believe that sifting flour is a waste of time, but for this specific recipe, it's vital. Because the dough is so thick and we aren't using an electric mixer to break up clumps, sifting ensures the baking soda is evenly distributed.
Without it, you might end up with a bitter, soapy bite where a clump of soda didn't dissolve.
Another myth is that "more chocolate is always better." While it's tempting to double the chocolate, there is a limit. If you add too much, there isn't enough dough to act as the "glue," and your cookies will simply fall apart when you try to pick them up.
Stick to the 1.5 cup ratio for the perfect balance of dough and chunk.
Finally, some say you must chill the dough for 24 hours. While chilling does deepen the flavor slightly, this recipe is designed to be "instant gratification" friendly. The brown butter provides so much flavor upfront that you don't need the long rest period to get a complex, delicious result.
You can bake these immediately and they will still be the best cookies you've ever had.
Recipe FAQs
What's the secret to chewy chocolate chip cookies?
The secret is browning the butter and using an extra egg yolk. Browning the butter creates a nutty, toasted flavor profile, while the extra yolk provides the necessary fat and moisture to keep the cookie texture soft and chewy rather than cakey.
Are these chocolate chip cookies good for diabetics?
No, these are not suitable for a diabetic diet. This recipe contains significant amounts of dark brown sugar and granulated cane sugar, which will cause a rapid spike in blood glucose levels.
What is the secret to the best chocolate chip cookie?
Use a combination of dark brown sugar and a high ratio of chocolate chunks. The molasses in the dark brown sugar keeps the centers moist, while folding in 1.5 cups of 70% dark chocolate chunks ensures a balanced, rich flavor in every bite.
How do I get my cookies to be chewy?
Remove the baking sheet from the oven when the edges are golden but the centers remain soft. Baking at 350°F for exactly 9-11 minutes ensures the moisture stays trapped in the center of the cookie.
Is it true I must add cornstarch to prevent spreading?
Yes, this is essential for texture and structure. Adding 1 teaspoon of cornstarch binds the ingredients, which helps the cookies maintain a thick, chewy structure and prevents them from becoming too thin or greasy during the 9-11 minute bake time.
How do I make the dough ahead of time?
Portion the raw dough into 3-tablespoon balls and freeze them. You can store these frozen portions in a sealed container for up to 3 months, allowing you to bake them fresh at 350°F whenever you need them.
How to achieve the best texture after mixing?
Whisk the egg, egg yolk, and vanilla extract vigorously for 1-2 minutes. This process aerates the mixture, causing it to lighten in color and become glossy, which creates a better internal structure before adding the flour, cornstarch, baking soda, and salt.
Best Chewy Chocolate Chip Cookies

